You may want to send Health Check invites in the post, you can populate the invite letters using Mail Merge in Word.
Before creating the Health Checks invite template you should have completed the download from Skyline. This is needed to import the merge fields into the document. The instructions can be found here How To Complete Health Checks Invites And Recalls
Open an existing Word document, or create a new one.
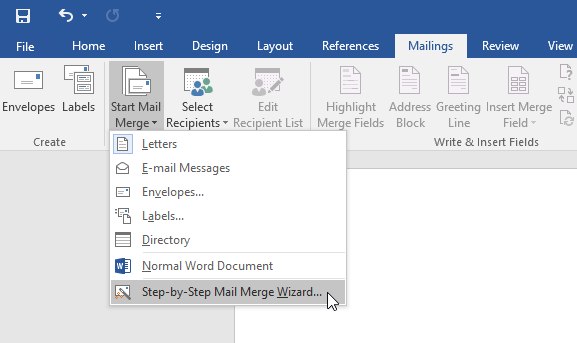
Click on Mailings in the top menu
Click on Start Mail Merge
Click on Step-by-Step Mail Merge Wizard from the drop-down menu
The Mail Merge pane will appear and guide you through Six Steps below.
Step 1:
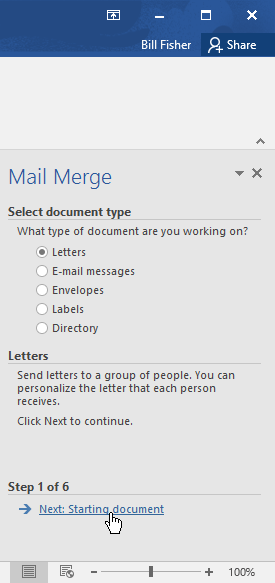
The Mail Merge task pane will be on the on the right side of the Word window
Under document type: Click on Letters
Under step 1 of 6: Click on Next: Starting document
Step 2:
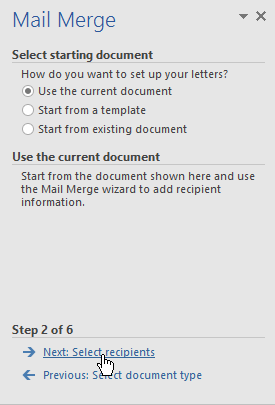
Under starting document: Click on Use the current document
Under step 2 of 6: Click on Next: Select recipients
Step 3:
You'll need an address list so Word can automatically place each address into the document. The list can be in an existing file, such as the file you downloaded from Skyline.
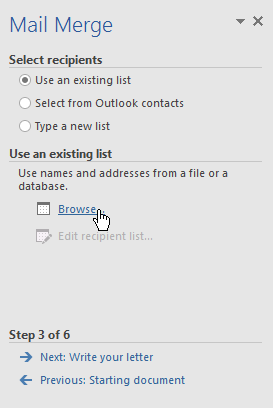
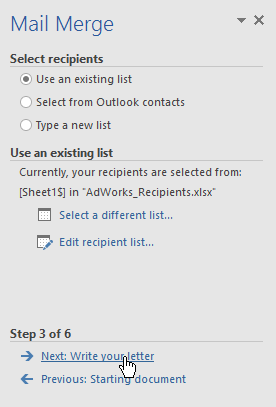
Use an existing list will be selected as default
Under use an existing list: Click on Browse or Select A Different List to select the file
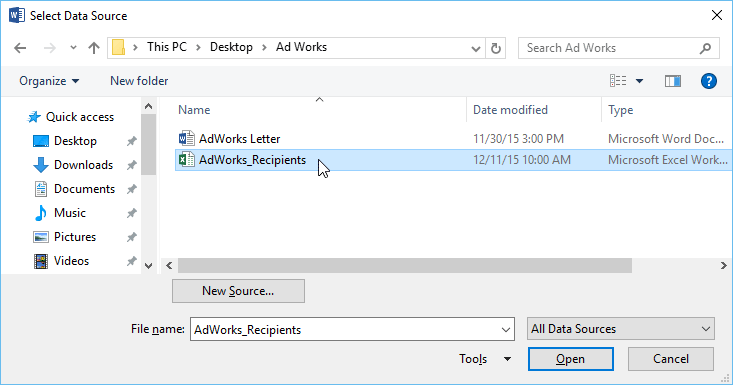
Browse to and highlight to the excel document you downloaded from Skyline and saved
Click on Open
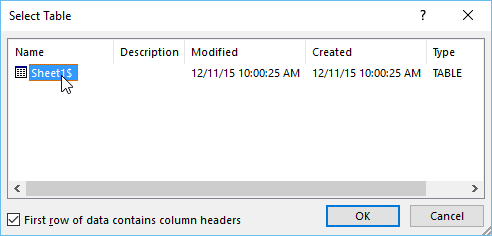
Select Table will open: Click on OK
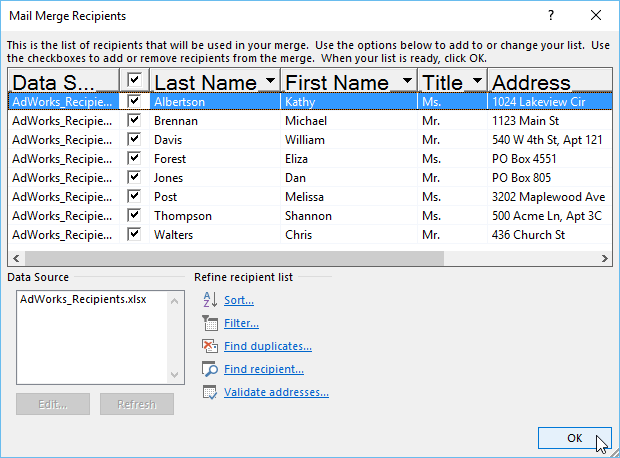
The Mail Merge Recipients will be listed, all are ticked as default. You can uncheck recipients if needed.
Click on OK
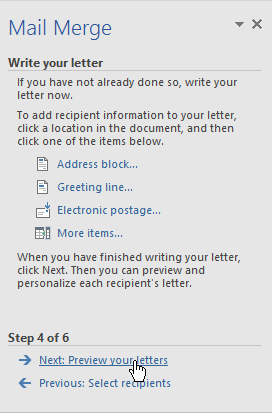
Under step 3 of 6: Click Next: Write your letter
Step 4:
You’re now ready to create your invite letter template. When it's printed, the body of the letter will be the same; the only difference will the recipient data (such as the name and address).
Example Letter
Dear
We are writing to let you know that you are eligible for a free NHS Health Check. Please contact the surgery to book an appointment as soon as possible.
Yours Sincerely
Practice Nurse
To insert recipient data:
Place the cursor in the document where you want the information to appear.
Click on More Items
Double click on the field name or select and click insert
Note, it’s easier to insert all the fields you want in the letter first (won’t be in the right place) and then move them in the document.
Note, remember to leave a blank space at the top of the document if you’re using practice headed paper. You could also paste in the practice header into the template if needed.
You can also add a date
Move the cursor in the document where you want the date to be inserted
Click on the Insert tab in the Word menu
Look across the menu for the Text section
Click on Date & Time
Select the date format you want
Tick Update Automatically
Click on OK
Your template will now have the date populated
Under step 4 of 6: Click on Next: Preview your letters
Step 5:
The first recipient name and address will be populated into the letter. Note, if there’s blanks in the address, for example address line 4, this is because there’s no data in this field.
Preview the letters to make sure the information from the recipient list appears correctly in the letter.
You can use the left and right scroll arrows under Preview You Letters to view each document.
Note, at this point you may see that a certain filed is always blank, for example address 5 and may want to remove this from the template. You can do this by simply deleting the blank line.
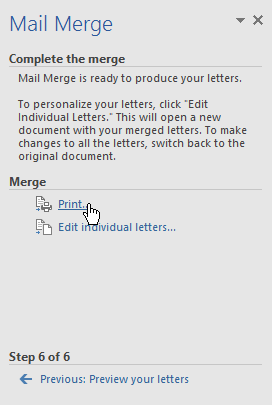
If everything looks correct, under Steps 5 of 6: Click Next: Complete the merge
Step 6:
Under Merge: Click on Print to print the letters
Decide if you want to print All of the letters, the current document (1 letter), or only a select group
In the example below we’ll print all of the letters.
Click on OK - your invites should now be printing
